|
Inking
Tutorial
So you've drawn something cool, and now you'd like
to ink it. Inking is easy. It's pretty much just tracing the lines of
your drawing with a pen, right? Sure. Whatever you say!
You start with your pencil sketch. In this case, done with a non-photo blue pencil. After
inking, the scanner can be set up to ignore blue lines, leaving only
your ink.

Then you trace it with your pen. Man, that was easy!
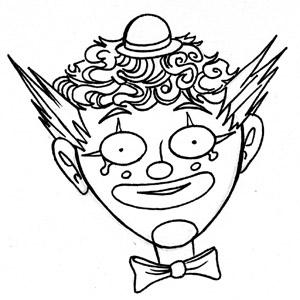
Now don't get me wrong. The above drawing is fairly clean and
accurate. Maybe it's suitable for… something. Like a coloring book. But make no mistake.
This is a bad job of inking.
So what is it missing? Neatness aside, and all things being
equal, what's the difference between a bad ink job and a good one?
Simple. Varying line thickness. I
only used one line thickness to ink that whole thing.
So you're saying, "Ohhh. Ok. Give me just one minute." You
reemerge from your desk with something like this:
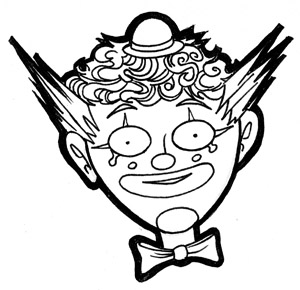
Yeah, nice try. That sucks almost as much as the first one. You
knew you had to get at least one more line thickness in there, but it's
clear you were confused over the criteria by which you decide to thicken
some lines over others. While giving the drawing a heavy, fat-ass
perimeter approaches some vaguely cogent methodology, it's just not
going to cut it.
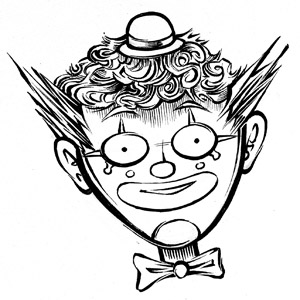
Above is a good example of a good diversity of line thickness,
applied with a sense rhyme and reason. Thick lines make certain aspects
of the drawing more emphatic when needed, while thinner lines understate
other aspects. The lines have energy. They play with each other. This is
the difference between good inking and bad. This is my natural inking
style (honestly, it was a lot easier for me to ink that than the first
example). Speaking of style, this brings me to a good point. A simple
definition of inking style:
A personal inking style is
dictated entirely by the methods
used to vary your line thickness, and the criteria by which you vary
it.
Ok, sure, there are some other factors, like how one feathers and
shades and such. But in my opinion, all these factors are pretty
strongly overshadowed by that basic definition.
So you're now saying, "Ok, fine, it's really important. But how
should I do it, and when? I mean, I tried that fat perimeter thing
already. I'm out of ideas."
This is a pretty complicated question to answer. There are tons of reasons to change up your line
thickness, many of them serving utility in the drawing, and many just
boiling down to personal taste and preference (just as I said, it and
personal style are essentially one and the same). I'll discuss it in
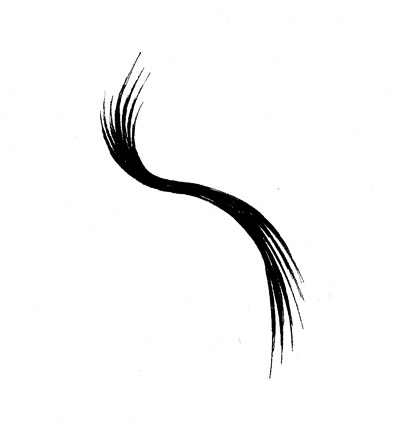
further depth later, but just to give you a taste of one idea, falling
under the “utility” category, see the drawing below. You'll note how the
lines in the arms get thicker gradually, the closer they extend towards
you. Here, line thickness is helping to show distance. Near objects have
heavy lines, far objects are finer.
Let's talk briefly about the tools of the trade. Or at least the
tools of this tutorial. Micron pens:
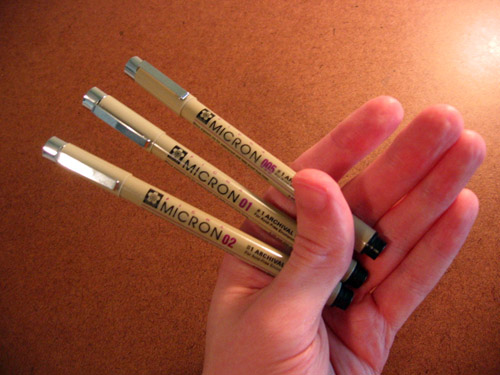
I generally keep on hand 02, 01, and 005 (from thickest to
finest). It's nice to have an array, but don't get suckered in to
thinking you need it. I did
virtually all inking in this tutorial with an 02, to illustrate a point.
You can make very fine marks with even a very fat marker if your touch
is light enough.
Note, you can also ink with a brush, or a brush-tipped marker.
This is an inking with a pen tutorial,
not an inking with a brush tutorial. Inking with a pen and a
brush are totally different animals. With a pen, the mark is confined to
a single point. Thus complete control over the mark is much easier,
because all you have to do is control one point in space with your
fingers. A brush tip by nature is bigger and floppier, and mastery takes
considerably more grace, I think. The results of brush inking tend to be
more organic and free-flowing, and can be totally mind-blowing if done
well, but those skills exceed the scope of this tutorial.
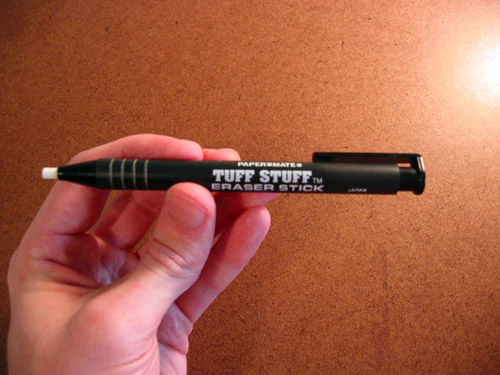
You'll also need an eraser, if you choose to pencil with
graphite, ink over it, then erase it later. This is how I do 95% of my
work. Here's what I use. Probably the best eraser I've ever used for
erasing pencil.
Thickening your lines
Before we get into why
you would thicken, let's talk about how. Seems trivial, drawing thick
lines, but maybe there's more to it than you think. You might suggest,
“Hell, if I need to draw a really thick line, I'll bust out my really
thick marker.” That's a silly line of reasoning, and I advise you to
dispense with it. Remember, I'm only using an 02 for this whole thing.
Switching to a really thick marker would rob you of some finesse, which
I suggest you will need, even
when you are doing thick lines.
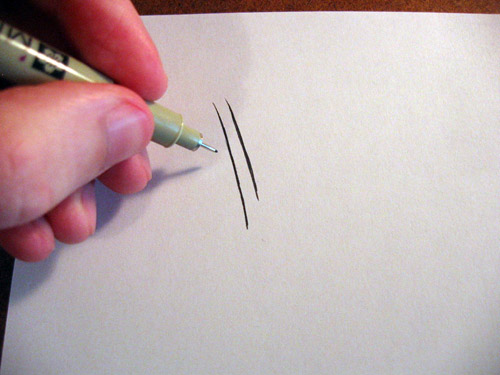
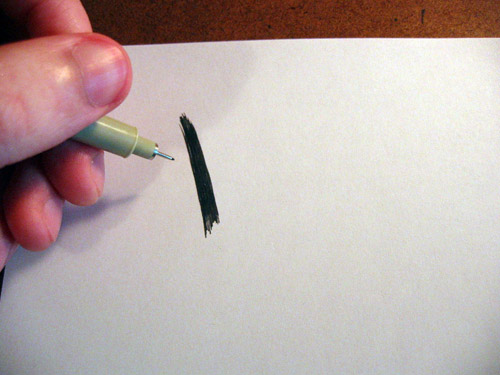
Method 1: Draw boundaries, then
fill
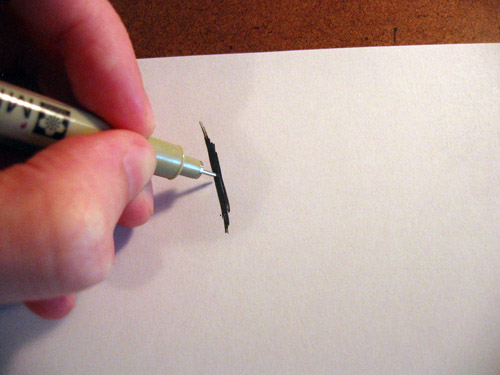
Drawing one thick line is actually the same thing and drawing two
very thin lines.
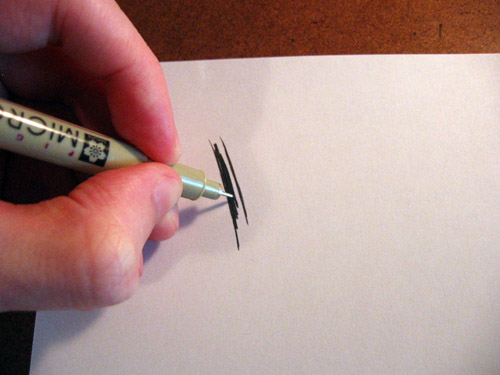
Color in between. That's the easy part. Note, you can now switch
to a thicker marker if you desire for the fill, rather than wasting the
ink of your finer markers. You'll note I'm not following that advice
here (though I often do).
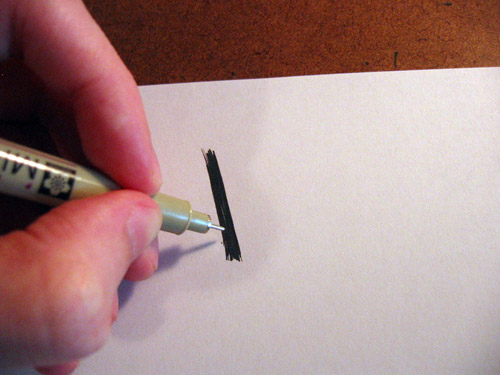
Method 2: Thicken as you
fill
This is the method I use far more often. I make lots of little
sweeping strokes quickly until the thickness and contour feels right. To
me, this practice injects a little of the life and energy from rough
sketching into a process that is otherwise quite technical and exacting.
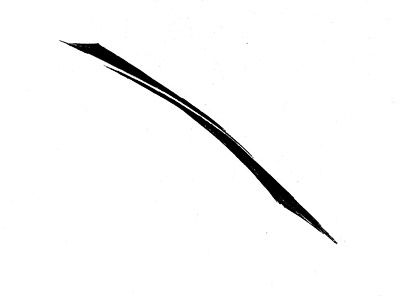
Tapering
Varying line thickness doesn't just mean making some lines
thicker than others. You can of course vary the thickness within the
same line. This is in fact an excellent thing to do for most of your lines (given you apply
some method to your madness, which is something that takes practice). A
tapered line is almost universally more attractive and energetic than an
ordinary line. I can't tell you how to draw these. It just takes
practice, and a light touch. But I will say if you adhere to method 2
above, it makes it a much easier, fluid move to go from drawing an
ordinary line to a tapered one.
What can a line be?
A line, technically, is a straight, solid connection between two
points. But we're artists here, and it's up to us to declare what
comprises a line. A line can twist and bend and zag, tapering in and
out, of course. Just as it doesn't have to be straight, nor does it have
to be solid. There are lots of things you can do to a line to increase
its dynamism, to get it to tell a story that a more boring line couldn't
possibly tell. As you build your personal style, you will hopefully
evolve your own techniques that both feel natural, and look good. Here
are a few of mine.
Fractured line
Simply two tapered lines, opposing each other, to emulate a white
streak through them. This is infinitely more electric than a typical
line, if used right.
Multiple fracture
Same concept, done a few times. Looks like one line, but conveys
plenty of movement.
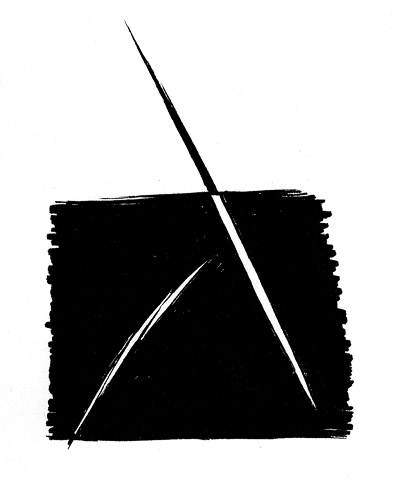
Negative space
Cut your lines into black space. And don't just draw black lines,
then invert them in Photoshop. That's fucking lame.
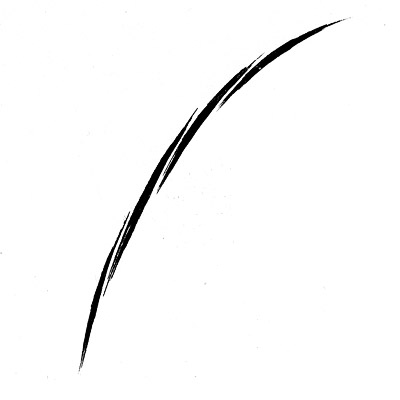
Sometimes it's what you don't
draw
This line tapers into non-existence at places, alluding to
continuity. It takes a lot of intuitive know-how to exercise this. Trust
me, there's just a feel for when
a line should vanish, and then reappear. It won't look right if you
don't have that feel. Maybe this is something enclosed in the confines
of my personal style.
Frayed edges
Why simply cut a line when it's done when you could rip it off
with your teeth?
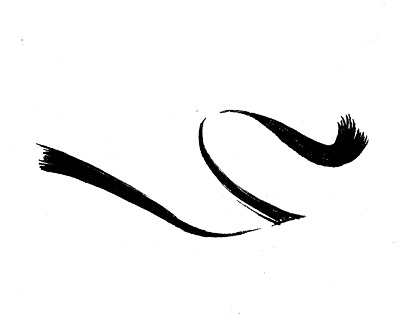
I'm not using a brush, but you don't need to know that
Often I will use microns to emulate brush strokes. Again, this is
a feel thing, and I wouldn't even know where to begin teaching this. The
results can be interesting, sort of reminiscent of a real brush, but a
kind of virtual feel to it. Like a brush that only exists in my fantasy
world. I actually use this very frequently as a paradigm for what to do
with my lines, asking “what would a brush do here?” It's usually a
simpler line than this example. For instance, as I draw a thin line, and
it's about to turn a corner to form a bend, I would speculate how my
virtual brush would make it turn that corner.
So those are a few of my tricks. Not nearly all. I could go on
for pages. Before I proceed, I should point something out to you:
This is not a “How to ink like
S_O tutorial”
In fact, even if you try to copy precisely the techniques I'm
going over, you won't be able to. (unless you are already quite skilled,
in which case, this tutorial is only of academic interest to you anyway)
You shouldn't even try, really, since it will not be constructive. What
I am doing here is providing you with the right things to think about as
you forge your own personal techniques. Those techniques will emerge as
a natural compromise between what you are most comfortable with, what
tricks your pen gravitates towards, and what you enjoy and are striving
for as a style.
Let's talk a bit about…
Feathering
I'm not going to go crazy with this section, because of a few
things. One, feathering well involves some understanding of shading,
which you either observe from a reference or understand naturally from
years of drawing from life. Aside from that, technique itself is worth
discussing, but is still quite complex, with many potential styles,
reasons for doing it, and so on. I'd suggest it could very well use its
own tutorial.
But maybe more importantly than all that, the reason I'm not
going into it much is this. If you've been following along, you'll know
that LINE IS EVERYTHING.
Controlling line in every way is the key to mastering inking, and once
you have full command of your lines with you full arsenal of tricks, you
merely need to apply those in interesting, dynamic ways to areas you
want to feather. All feathering is is a collection of lines anyway. Your
lines.
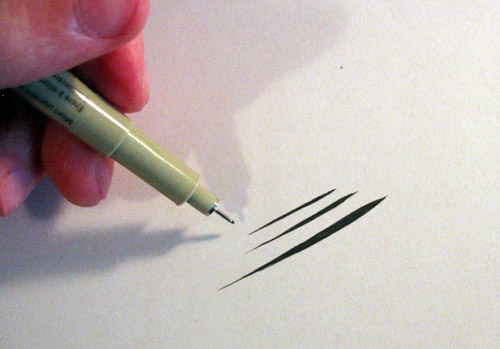
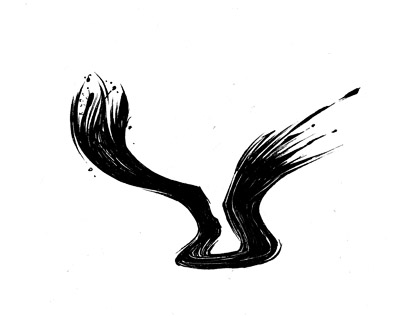
That said, this is my “go-to” style of feathering. Cheap, easy,
very fast, and quite effective in conveying tone with line. It's just a
series of thin, quick-stroked parallel lines, with a slight tapering
out. And be aware of the “hidden” line it creates where all the parallel
lines terminate. Yes, another kind of line!

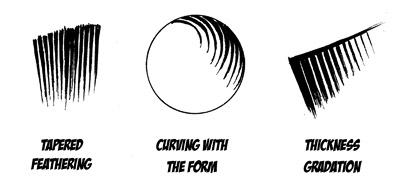
Here are a few other stand-bys. You'll note there's nothing on
cross hatching. I don't like it much. I think it's generally pretty
messy, and it's easy to overdo it with hatching. If you're looking for
advice on it, you're barking up the wrong tree.
Let's bring it all together. Sort
of.
I'll take you through my process of inking a comic page.
The paper I use for 95% of my projects is simple 8.5x11” printer
paper. Others will suggest you use Bristol, or something like that. The
pros certainly like it. There are good reasons. Markers will bleed more
easily on printer paper. The ink will spread out pretty rapidly if you
press the tip on the page. But, you can control the bleeding if you keep
a light touch with the pen, as I do. If you don't keep it in one place
for that long, bleeding's not a problem. The other reason is printer
paper is a lot smaller than Bristol, particularly for comic work. Is
bigger better? Conventional wisdom is, yes. You draw bigger, thus can
fit more detail in your drawings, then presumably scan it, and shrink it
down to a more manageable size. This smoothes over a lot of the tiny
defects in your work, and makes it look more crisp. So why do I draw on
this small crappy paper? I have great reasons. Drawing smaller = drawing
less lines, filling less areas, using less ink, spending less time. It
sounds like an odd reason, but it's absolutely true. Also, I'm actually
more comfortable drawing small. Sometimes I draw downright tiny. Small,
fine finger motions are easier to control and use less energy than big
broad wrist and arm motions. Oh, and one more advantage. Because
ultimately I will have to shrink it less, and can rely less on the
imperfection-healing of computer shrinkage, I am forced to stay more
disciplined and take more care with my lines. Ultimately, this makes me
stronger. But if you like the (very good) advantages of Bristol, then
use it. But don't use it because it's what the pros use. I won't tell anyone you're not a pro
if you don't.
Alright, that was a lot of talking about something that's not all
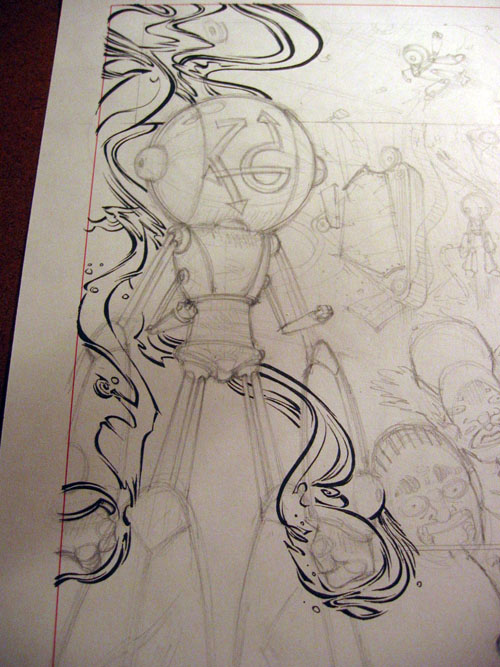
that exciting. Let's get on with it. I start by penciling the whole
thing out with a mechanical pencil.
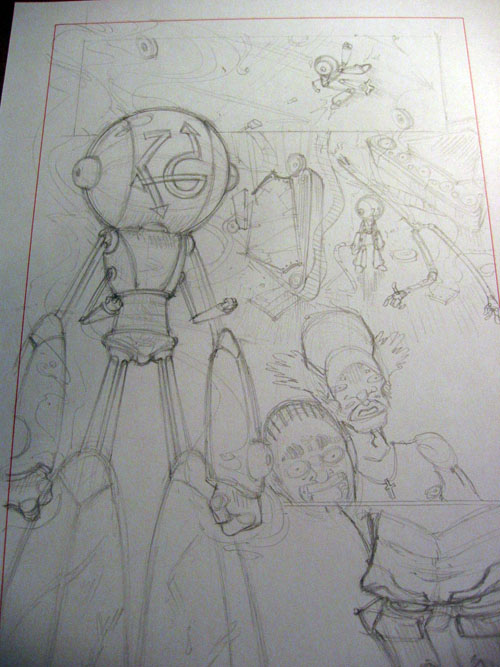
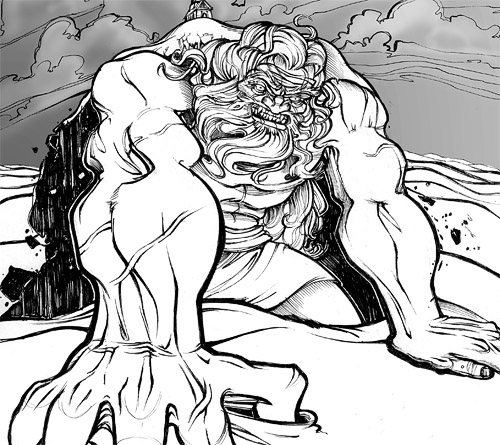
First thing I decide to ink is the smoke, because it overlaps a
lot of other things, and will effect the way I render things behind and
intersecting it. I'm varying line thickness like crazy, because it is a
very organic form. Notice how I'm employing some of the line tricks I
mentioned earlier. It's all very intuitive, and I can't really say why
I'm using a particular technique when I do. It's all entailed by the
mysterious schema of my personal style.
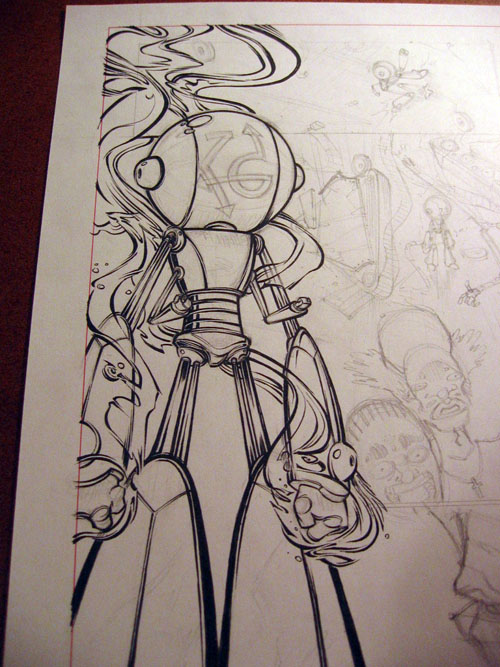
Filling out the rest of the linework on the body. As a rigid
body, it demands the lines be a little more straight-up (though not
too much). Note again I'm using
proximity as a factor in line weight. The legs, which are closer, have
thicker lines. It serves to strengthen the base of the figure nicely as
well.
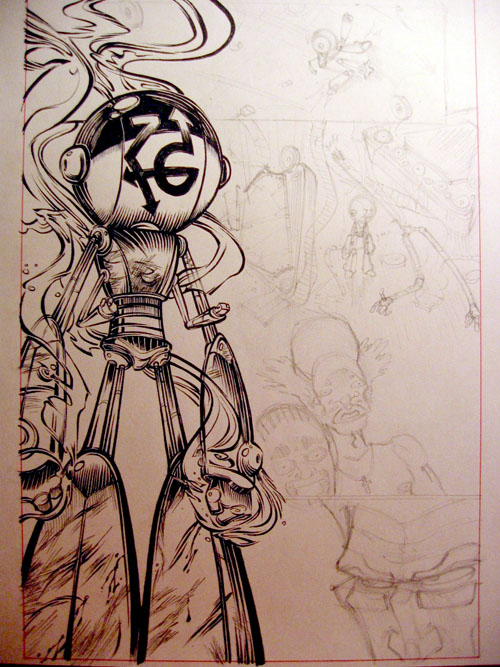
Completing the details, shading and feathering. A few different
types of feathering there, all pretty spontaneous, and nothing too much
by the book. Feathering is actually a good excuse to experiment with
interesting combinations of lines from your bag of tricks.
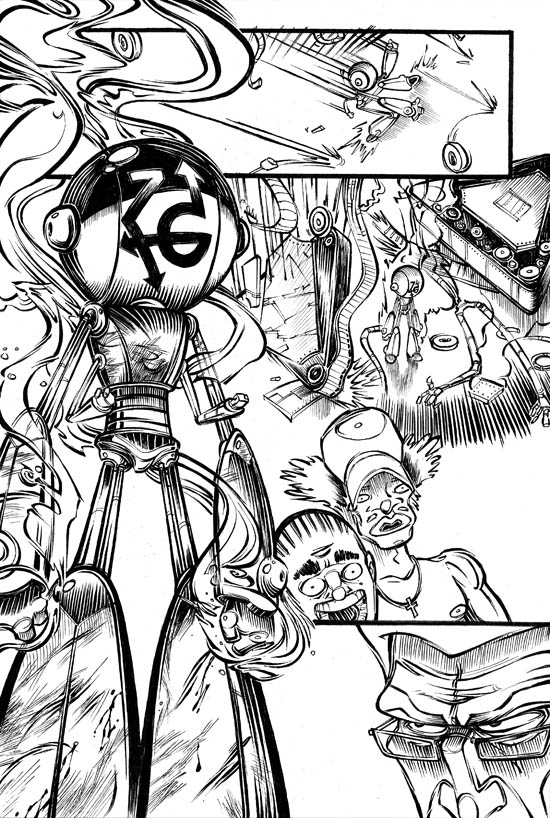
Rest of the page, done and scanned.
|